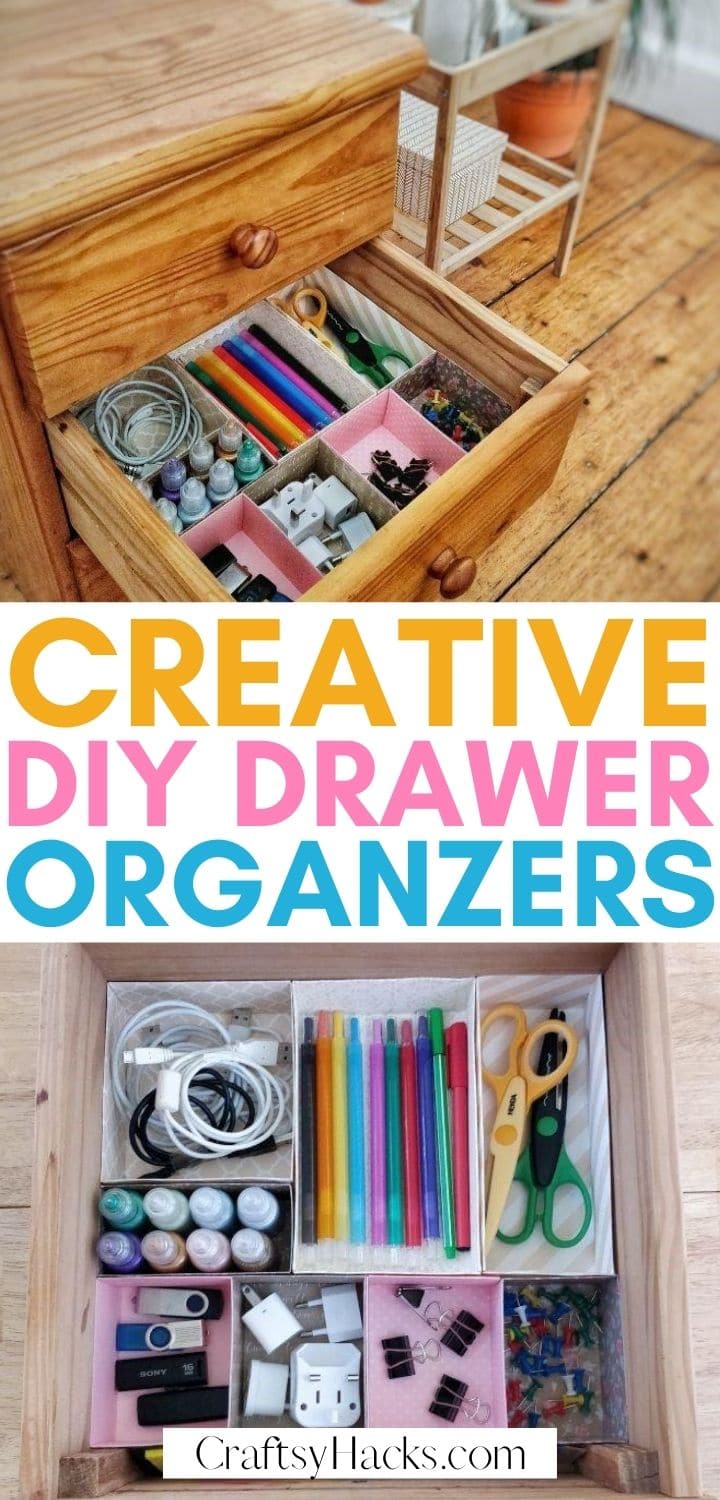
DIY Drawer Dividers Out of Cardboard
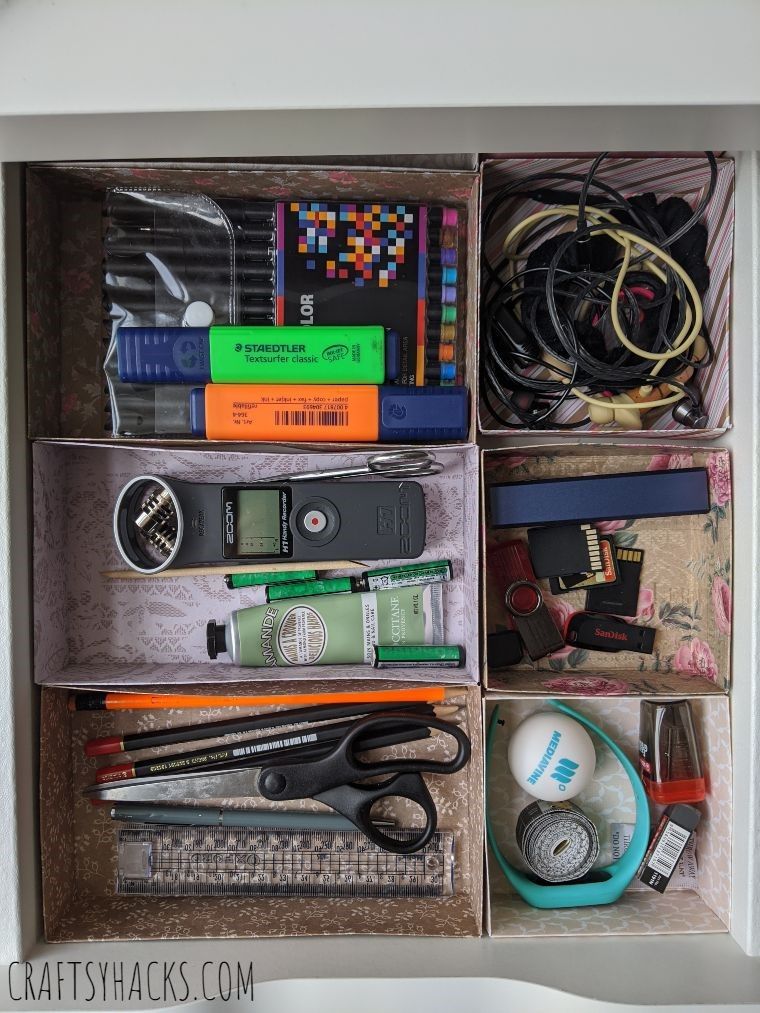
A disorganized drawer is fine worthy a ineffective drawer. No longer not as much as that’s what I mediate.
Sure, it is doubtless you’ll perchance also exhaust a drawer to store nearly anything else that suits. But when you happen to must spend hours rummaging by the muddle to search out one thing, a cluttered drawer is fine worthy only a extinguish of time and condo, isn’t it?
The key to fixing this muddle direct is the usage of drawer dividers or minute drawer compartments to separate the contents. You could always purchase these storage solutions in a range of stores, but it is doubtless you’ll perchance also moreover blueprint them yourself the usage of basically the most traditional crafting provides.
Withhold on discovering out to mosey looking out how I decluttered my drawers the usage of DIY dividers. There is nothing more fulfilling than organizing administrative center condo!
This blog is supported by readers purchasing featured merchandise. Whenever you happen to buy merchandise with my links, I invent a commission at no further cost to you. Right here is my chunky affiliate disclosure.
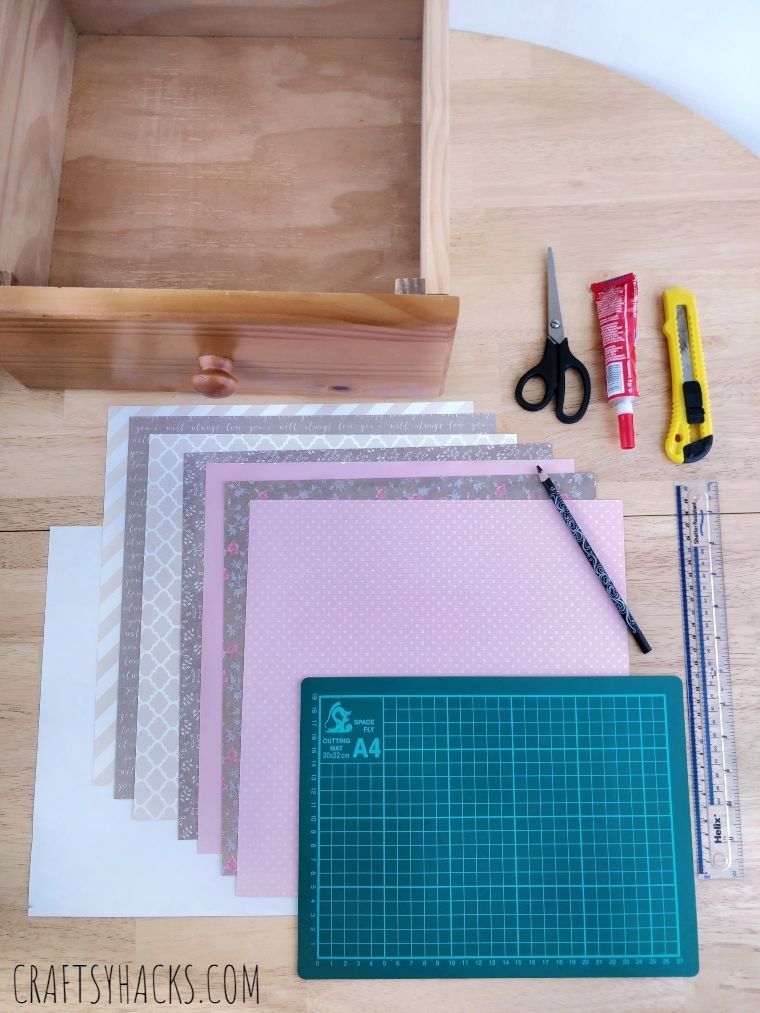
What You’ll Need
- Cardstock (patterned, 12″ x 12″, 200 gsm Heavyweight)
- Glue
- Pencil
- Scissors
- Craft knife
- A4 Lowering Mat
STEP 1
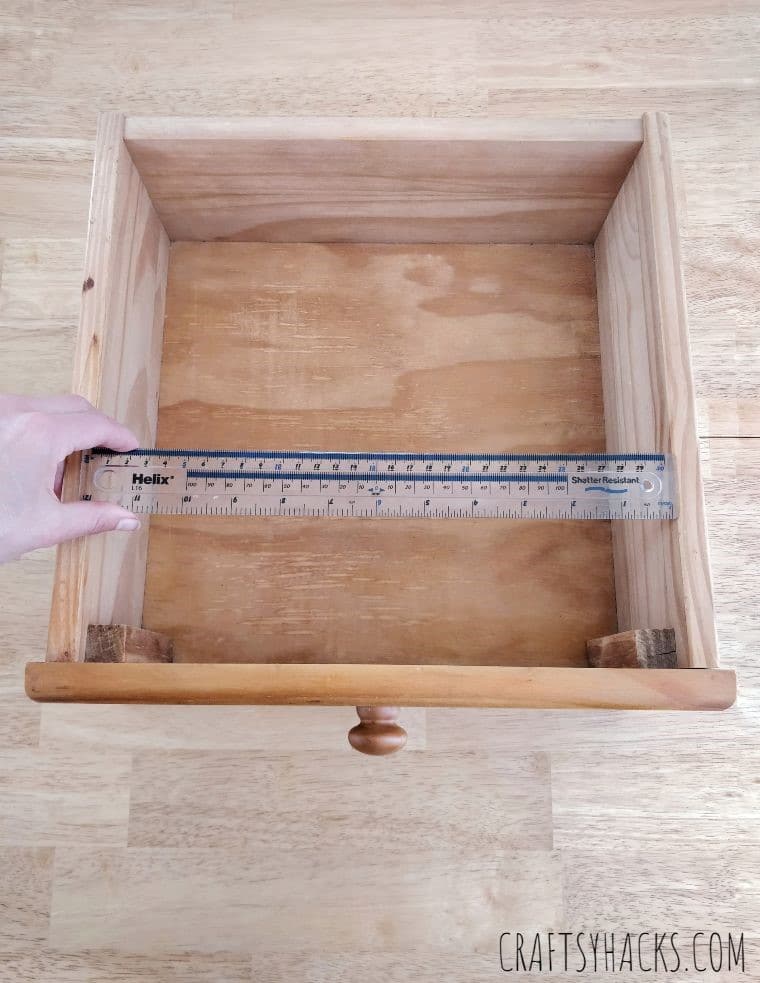
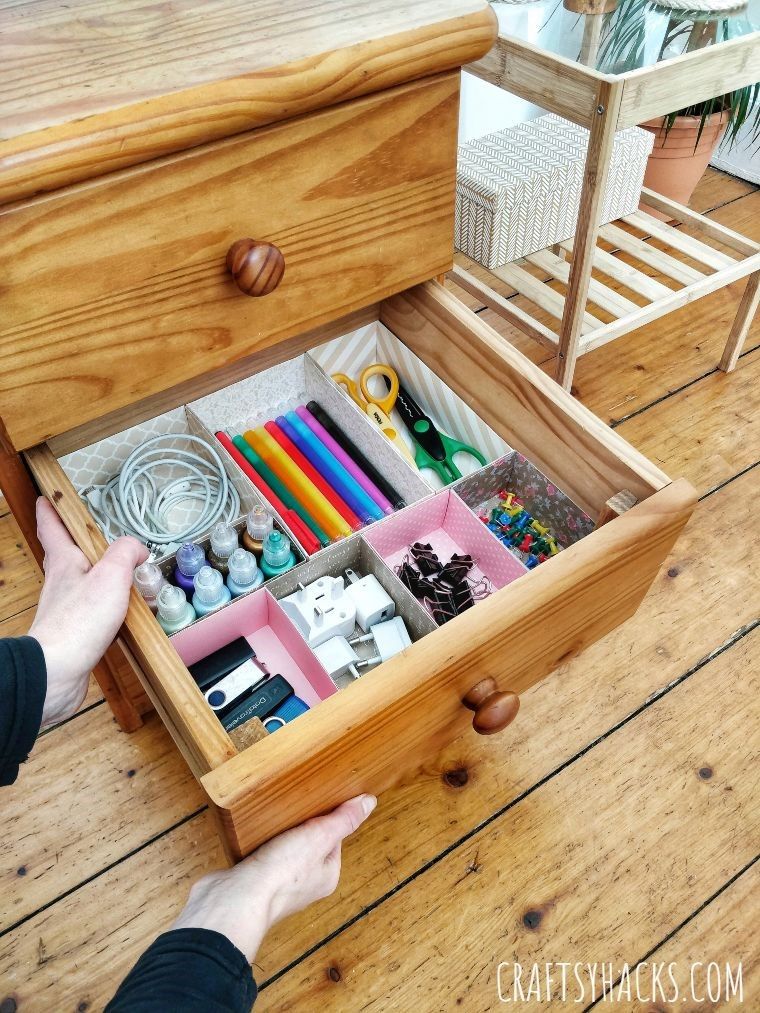
Your first step is to snatch out the drawer from the shelf and empty it of its contents.
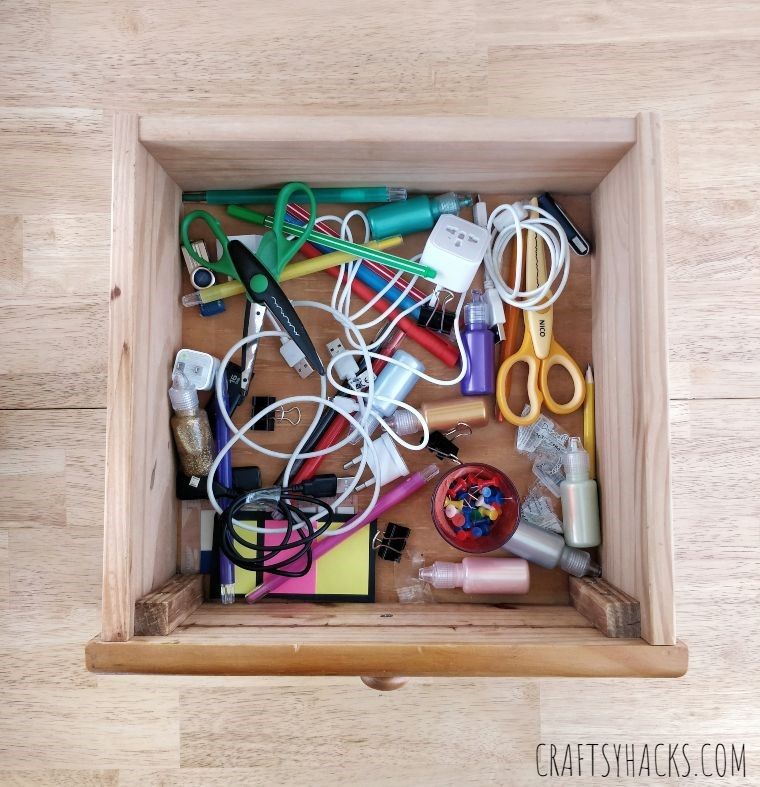
STEP 2
Subsequent, exhaust a ruler to measure the internal of the drawer. Disclose this measurement to slash one card stock to help because the grievous of your drawer.
STEP 3
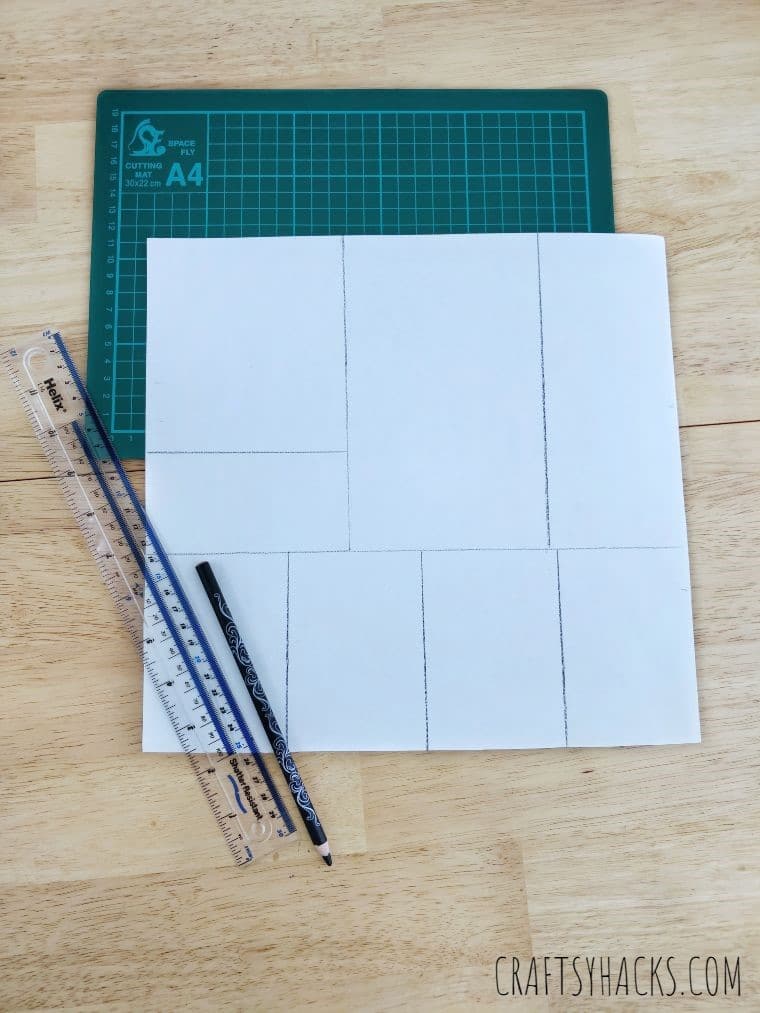
Set aside the slicing mat for your desk’s surface. Take hold of the grievous card stock and suppose this under the slicing mat.
Now, obtain the total drawer’s contents and place of living up them on the grievous, primarily primarily based entirely on how you will need them organized in the drawer. Have in recommendations to exhaust the slicing mat as a visual recordsdata to setting apart the contents.
Whenever you happen to’re gay with your invisible compartments, exhaust a pencil to compose a rough define of the compartments, remembering again to exhaust the slicing mat as a visual recordsdata.
STEP 4
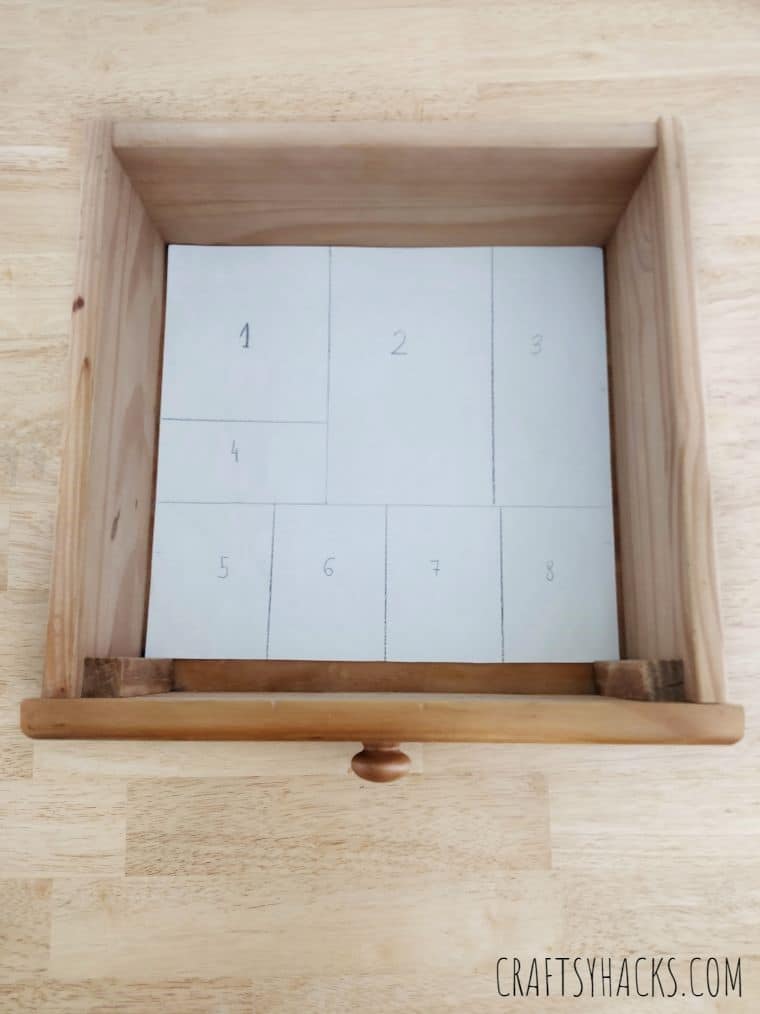
Location the contents aside to compose the grievous free, enabling you to exhaust the ruler to straighten out the rough define you made earlier. Whenever you’ve straightened out all traces, number every compartment.
STEP 5
Set aside the grievous card stock for your drawer again to double-test if your preliminary measurements are factual. This task affords you the likelihood to beget a rough thought of how your compartments would stare internal the drawer.
STEP 6
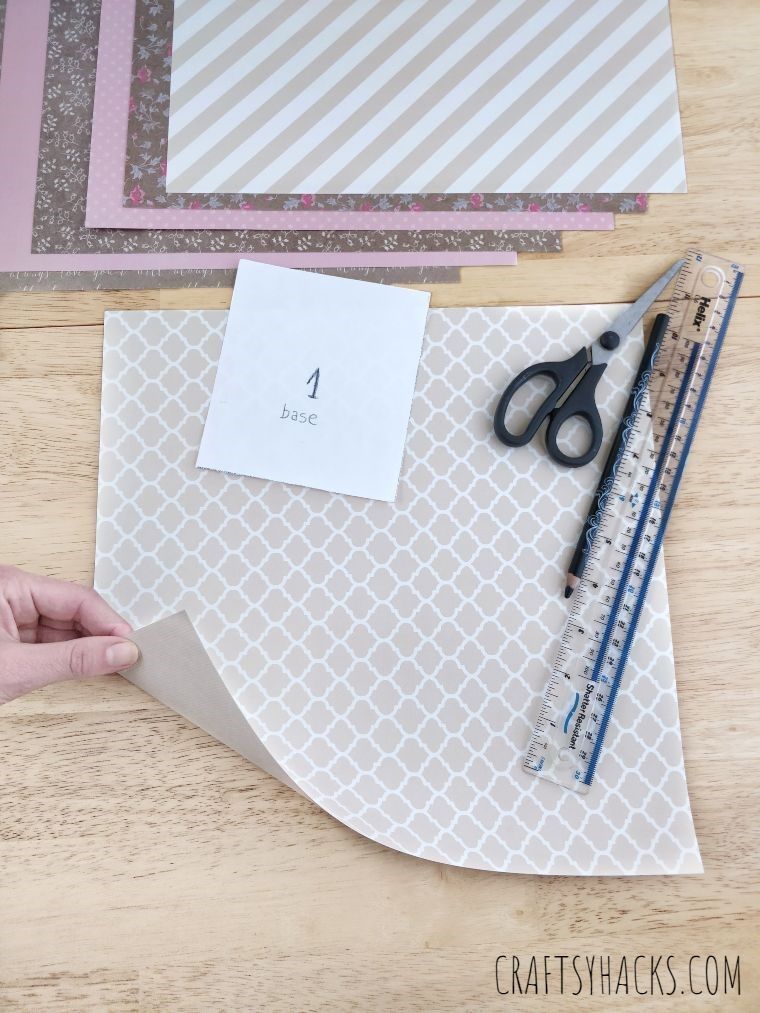
Ought to you’re gay with your grievous’s measurement and compartments, clutch this out of the drawer and line up the total card stock designs to your dividers.
Beginning with compartment one by selecting your most customary card stock blueprint for that divider.

STEP 7
Minimize compartment #1 out of your card stock, ensuring you don’t ruin the remainder of the outlined compartments.
STEP 8
Take hold of your card stock choice for compartment #1, and flip this over to uncover the undeniable (pattern-free) aspect of the card stock.
Set aside your first compartment slash out on this surface and space it in the middle. Disclose a pencil to diagram a rough define of this slash. This might perchance also just help as your divider’s grievous.
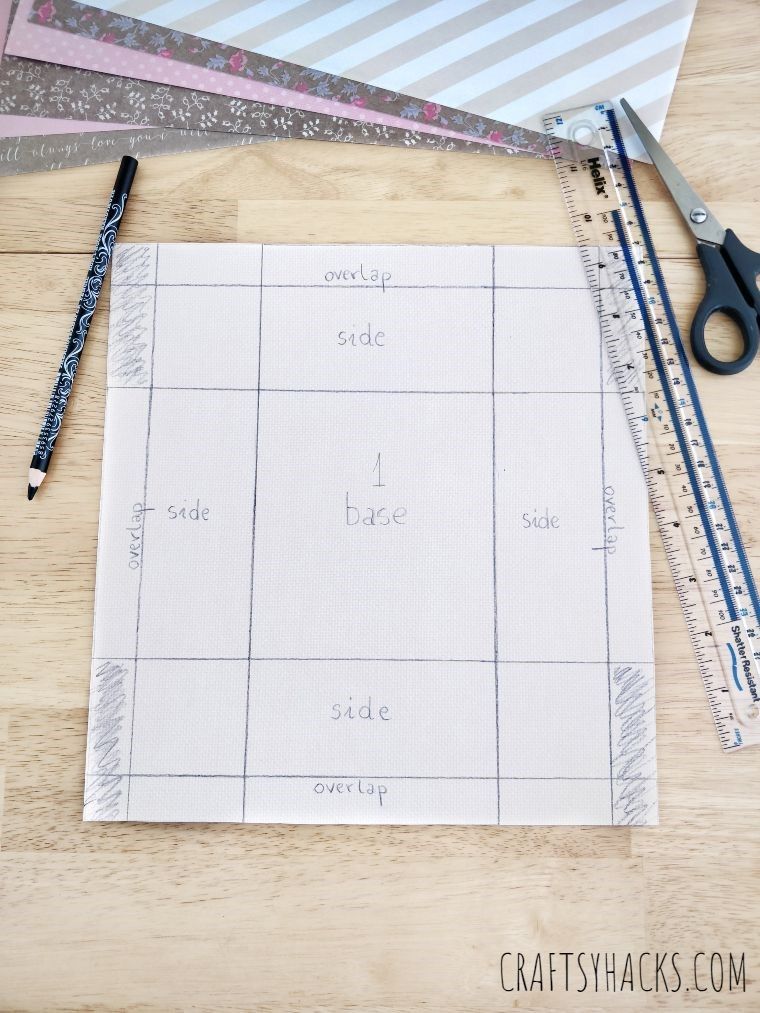
Disclose the ruler to snatch off 2 mm from every aspect of your rough define. This provides adequate adjustment for all of your compartments to fit when entirely assembled.
Think for your divider’s height and measure this on to your cardstock. Your cardstock must beget all these aspects outlined on this suppose: overlap-aspect-grievous-aspect-grievous-overlap, as viewed in the photo.
STEP 9
Minimize out the total extra corners surrounding the overlaps (announce about with the murky parts in the photo).
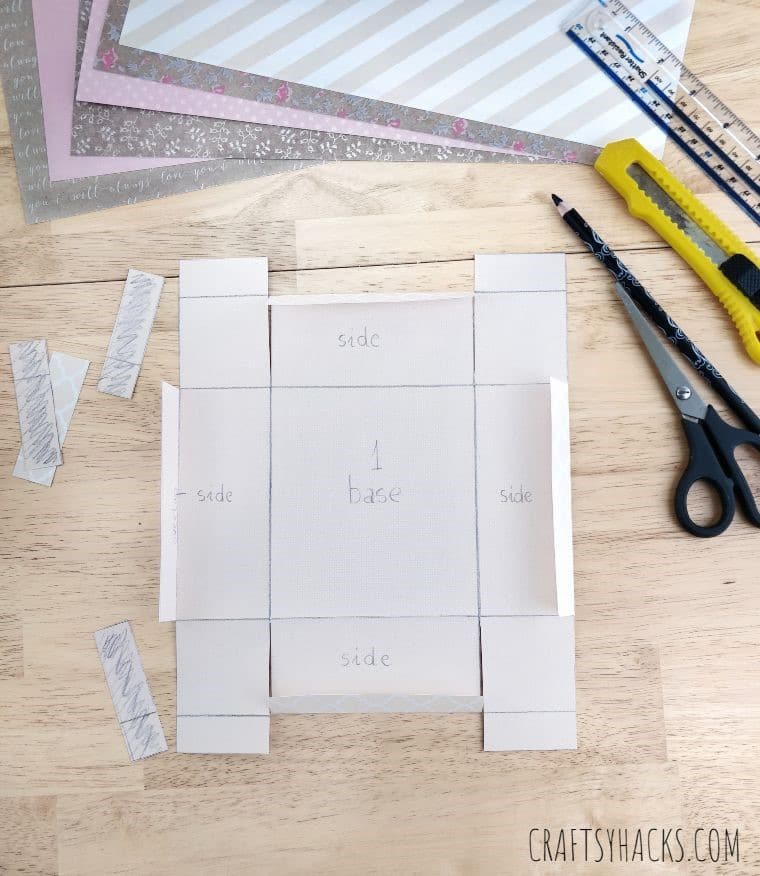
STEP 10
Fold the overlaps inwards on all four aspects of your divider.
STEP 11
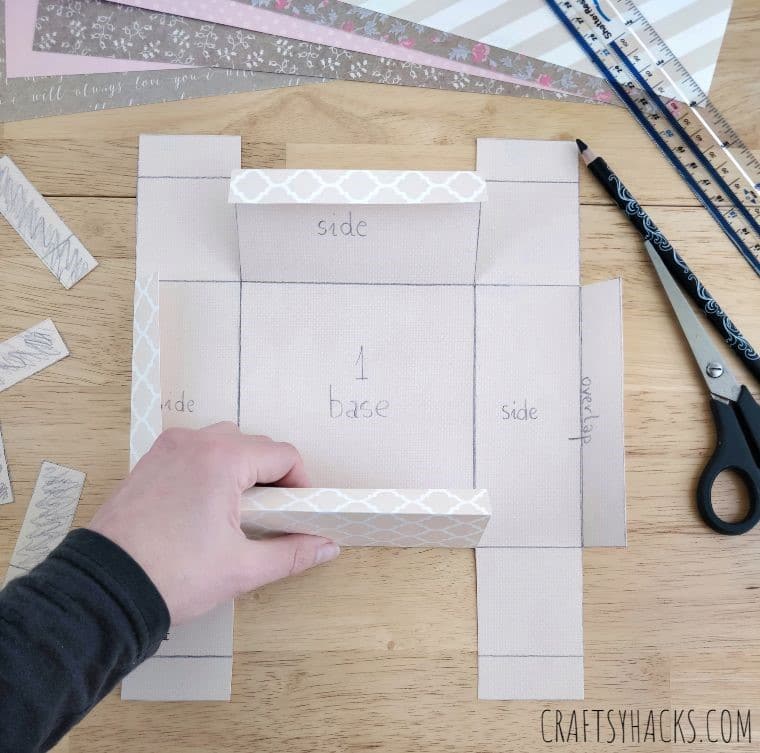
Flip the card stock over, revealing the patterned aspect.

STEP 12
Assemble your divider by folding your “aspects” up, following the outlines you’ve drawn.
STEP 13
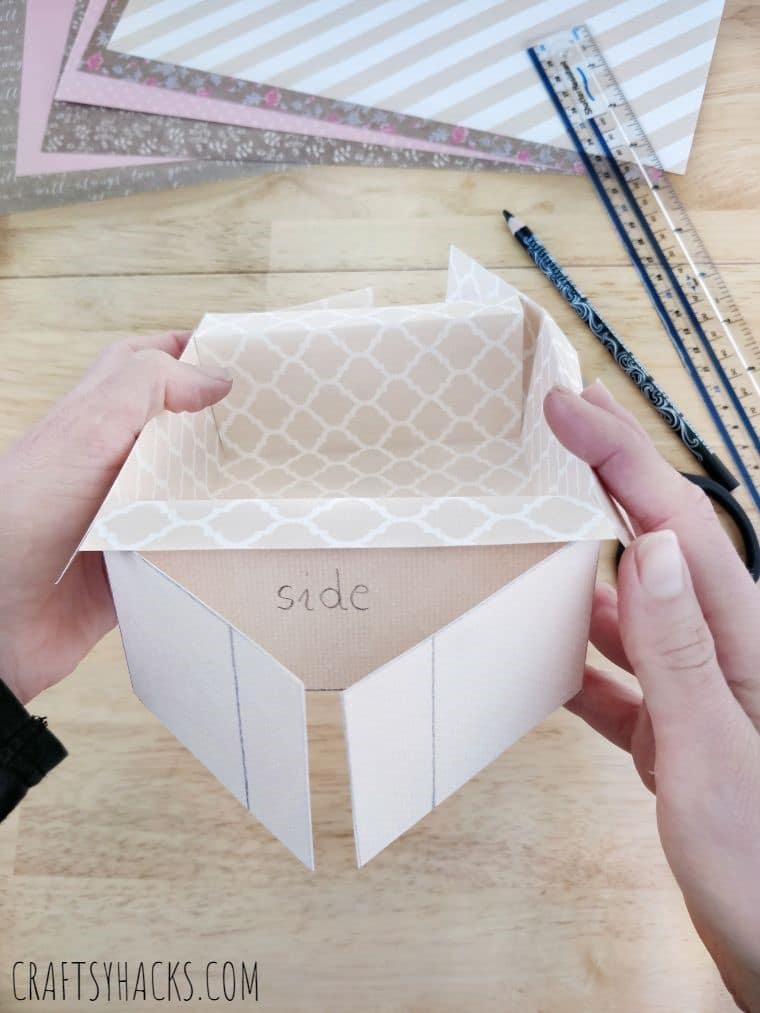
You are going to be left with extra flaps alongside the perimeters of the divider. Fold this neatly on high of every varied and stable in suppose with glue.
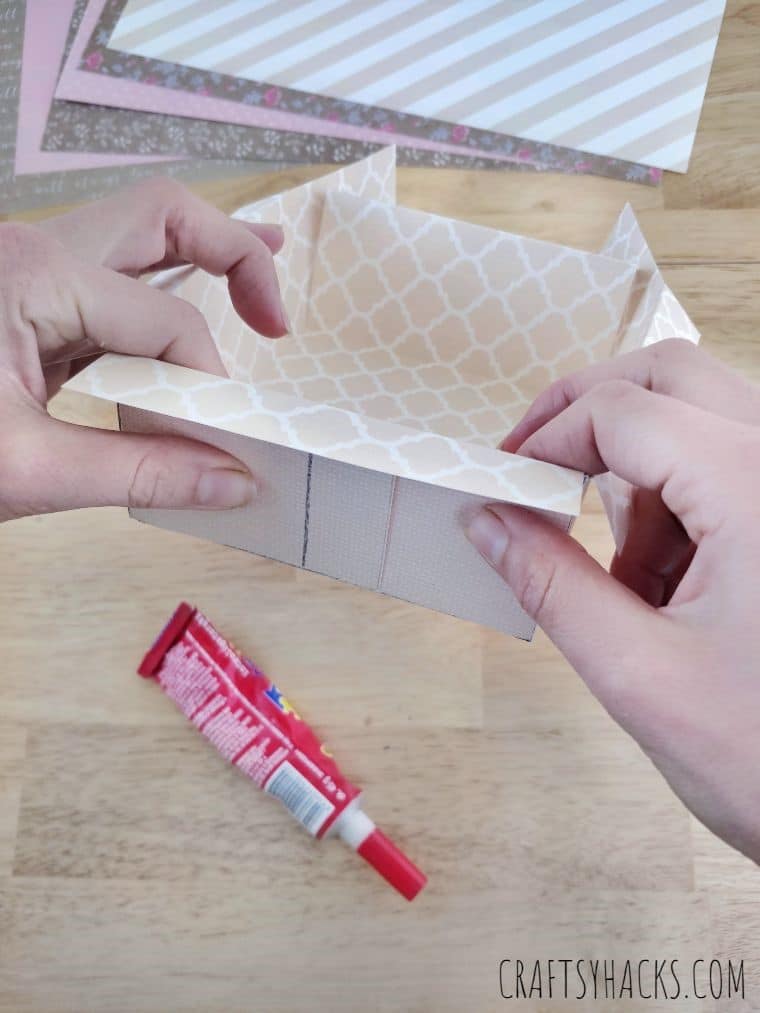
STEP 14
Dab glue on the overlap and fold it down, attaching this firmly on the divider.
STEP 15
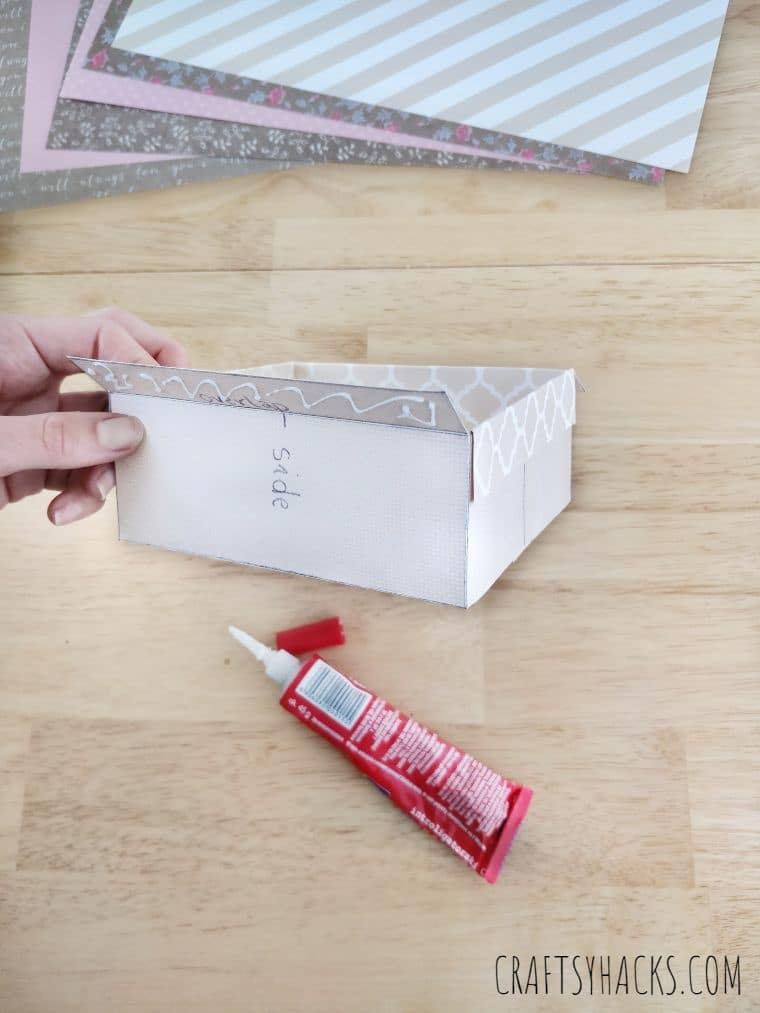
Repeat the identical task on the total overlaps. Repeat steps 1 to 15 for the remainder of your dividers.

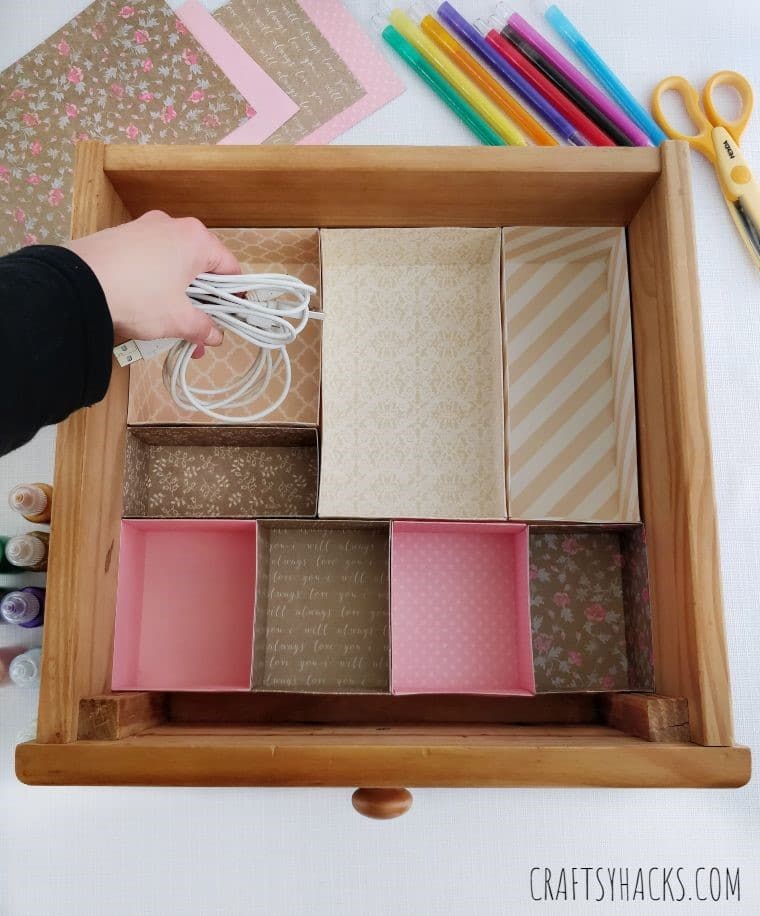
STEP 16
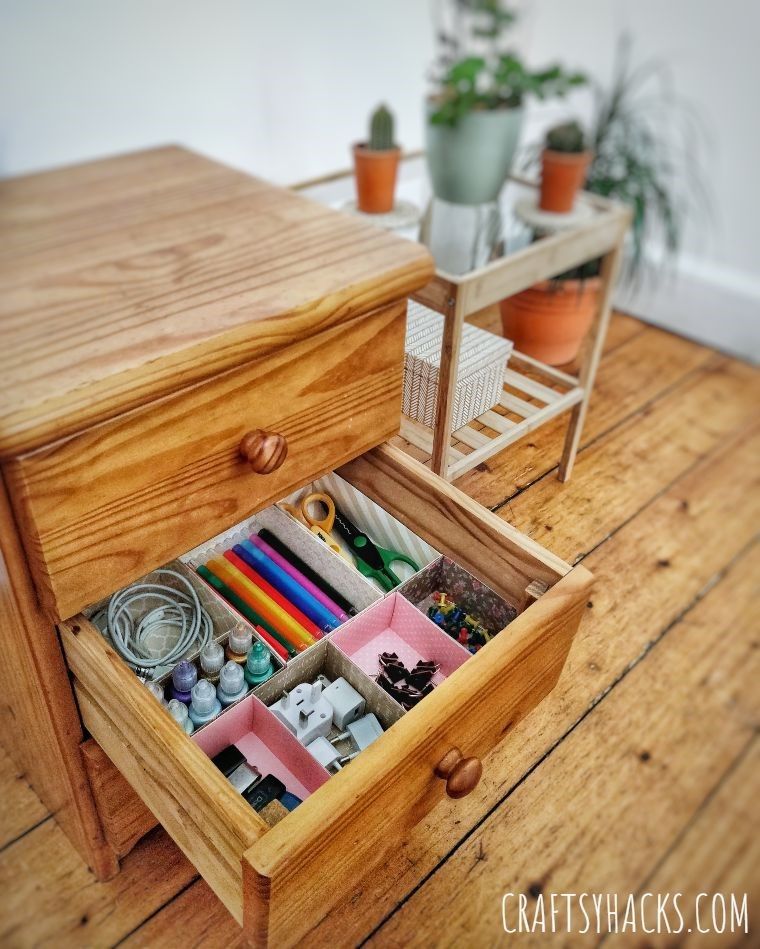
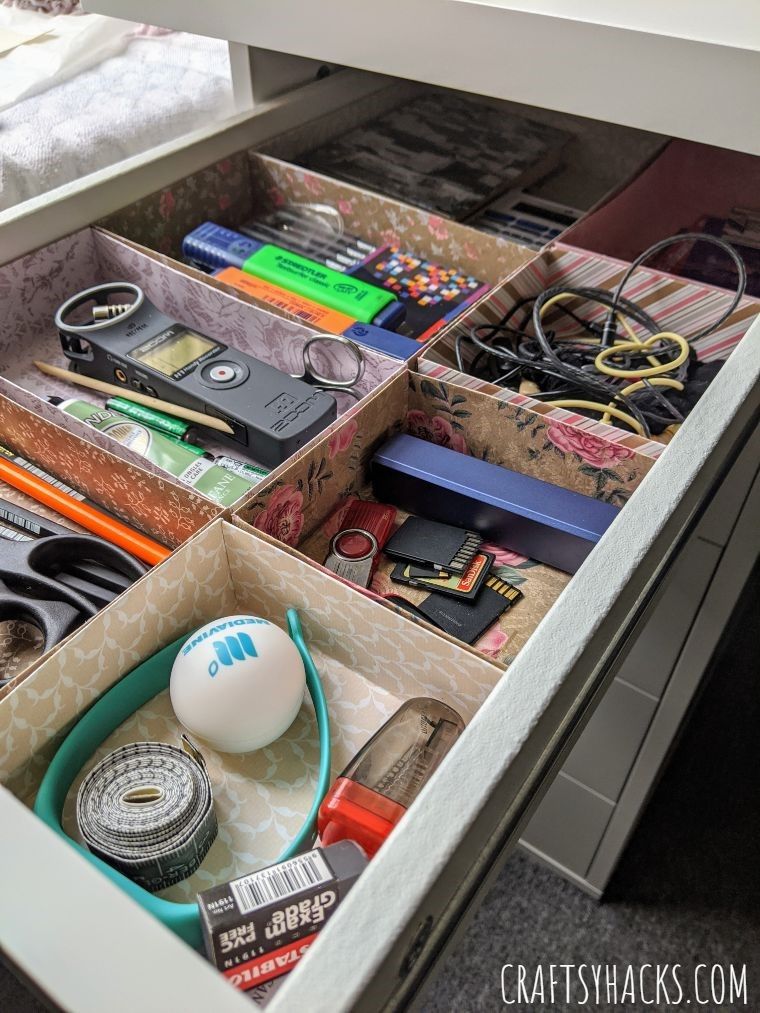
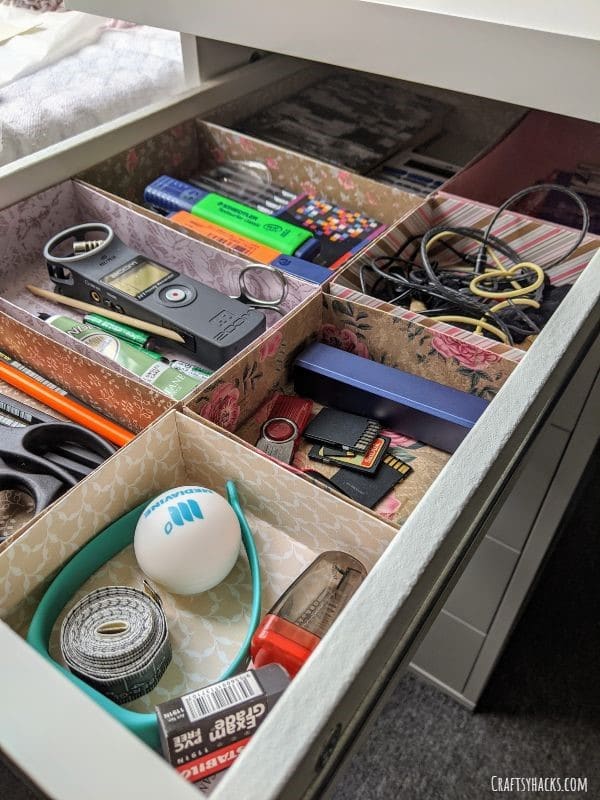
Line your dividers on the drawer primarily primarily based entirely for your deliberate structure. Take hold of your drawer contents and neatly suppose them into their respective dividers.
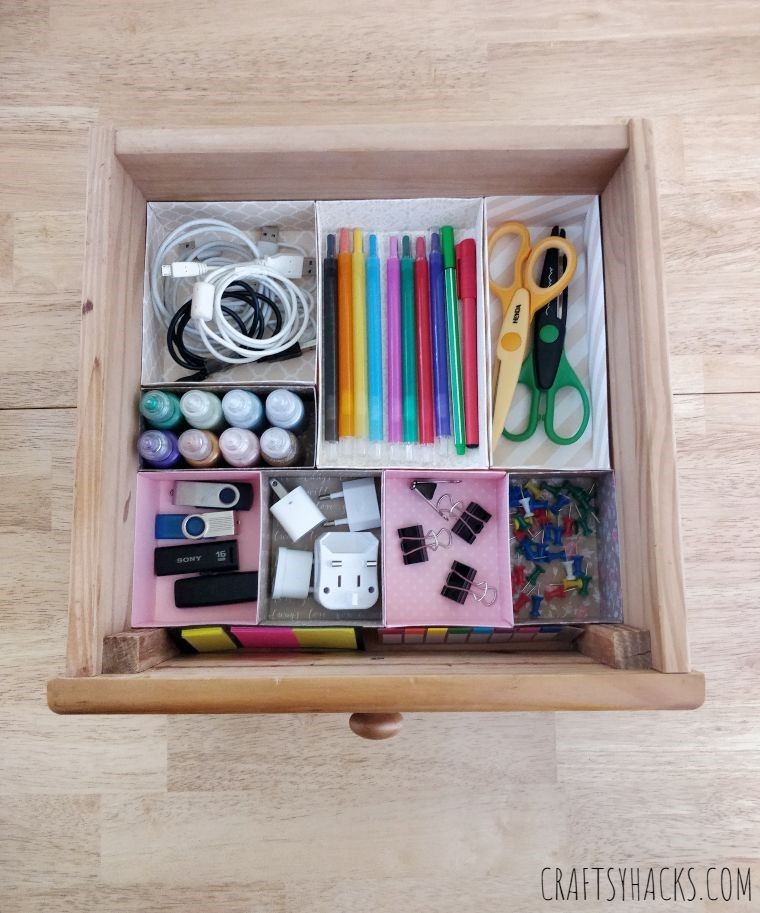
Taa Daa!!! Your drawer is now entirely functional, muddle-free, and mountainous easy on the eyes!
The next step is to combat by the remainder of the drawers at dwelling and whisper steps 1 to 16 again. Have faith me, doing this can compose yours and the remainder of the family’s lives more straightforward.
This challenge is also a stress-free exercise to develop with the kids to educate them a sense of group and reduction their creativity.
Different Organizing Tips You Would possibly perchance well perchance Dangle
- DIY Rope Organizer for Your Desk
- 15 Desk Group Tips
- 15 Greenback Retailer Organizing Hacks
Yield: Just a few Drawer Dividers
DIY Drawer Dividers Out of Cardboard
Affect an organizer out of cardboard and win your drawers organized! These are cheap budget organizers to your administrative center!
2 hours
2 hours
Medium
$2
Materials
- Cardstock
- Glue
Tools
- Pencil
- Scissors
- Craft knife
- A4 slicing mat
Instructions
- Acquire the total mandatory affords.
- Take out one drawer and empty its contents.
- Measure the internal of the drawer and diagram these measurements on undeniable card stock.
- Minimize the card stock primarily primarily based entirely for your measurement.
- Acquire the total drawer’s contents again and place of living up them for your slash card stock primarily primarily based entirely on how you will need them divided.
- The usage of a slicing mat placed above the card stock as a visual recordsdata, diagram a rough define throughout the contents the usage of a pencil.
- Take the contents off the card stock and exhaust a ruler to straighten out your rough define.
- Quantity the total compartments you beget outlined.
- Set aside the cardstock on the drawer again for a final fit and a final stare of your required divider structure.
- Take the card stock out of your drawer and begin creating the actual person dividers.
- Beginning by slicing out divider #1.
- Remove a cardstock blueprint for this divider and suppose the slash-out fragment in the midst of the non-patterned aspect of the card stock.
- The usage of a pencil, roughly define the slash-out card stock.
- Take out the card stock and exhaust a ruler to diagram a final define, taking 2 mm off both aspect of the rough define.
- Define the “aspects” of the divider primarily primarily based entirely for your most customary divider height.
- Disclose the overlap-aspect-grievous-aspect-overlap pattern when drawing your define.
- Minimize the extra aspects alongside both aspect of the overlaps.
- Fold the overlaps inwards.
- Flip the card stock to uncover the patterned surface.
- Fold alongside the remainder of the traces to form the box.
- Connect every aspect and overlaps the usage of glue.
- Repeat steps 1 to 21 for every of your dividers/compartments.
- Redo this challenge again and again till all of your drawers at dwelling beget dividers.
- Congratulations, you beget just saved your family from hours of rummaging by the muddle!


Yorumlar
Yorum Gönder